Cryptoucan™ usage: Handling e-mails in Outlook
We’ve already showed you how to sign, encrypt and decrypt e-mails in Thunderbird e-mail client, now it’s time for the same in Outlook. Read our article or watch the instructional video showing every step that we made for you.
When you are operating with e-mails in your everyday life, you’re most likely to use these three security features cryptography keys are used for:
- Encrypting e-mails – sending encrypted e-mails using other person’s public key that only they can read using their private key
- Decrypting e-mails – reading e-mails that someone encrypted for you using your private key
- Signing e-mails – signing e-mail using your private signature key so the receiver knows for sure who sent it
Keep reading to see how it’s done or click here to see our instructional video.
Quick Set-up
First of all, we’re going to set up GpgOL really quickly so it behaves the way we want it to. We’re going to look into General and Automation settings.
- Click GpgOL pop-up window symbol that’s right under question mark on the top right corner of the window
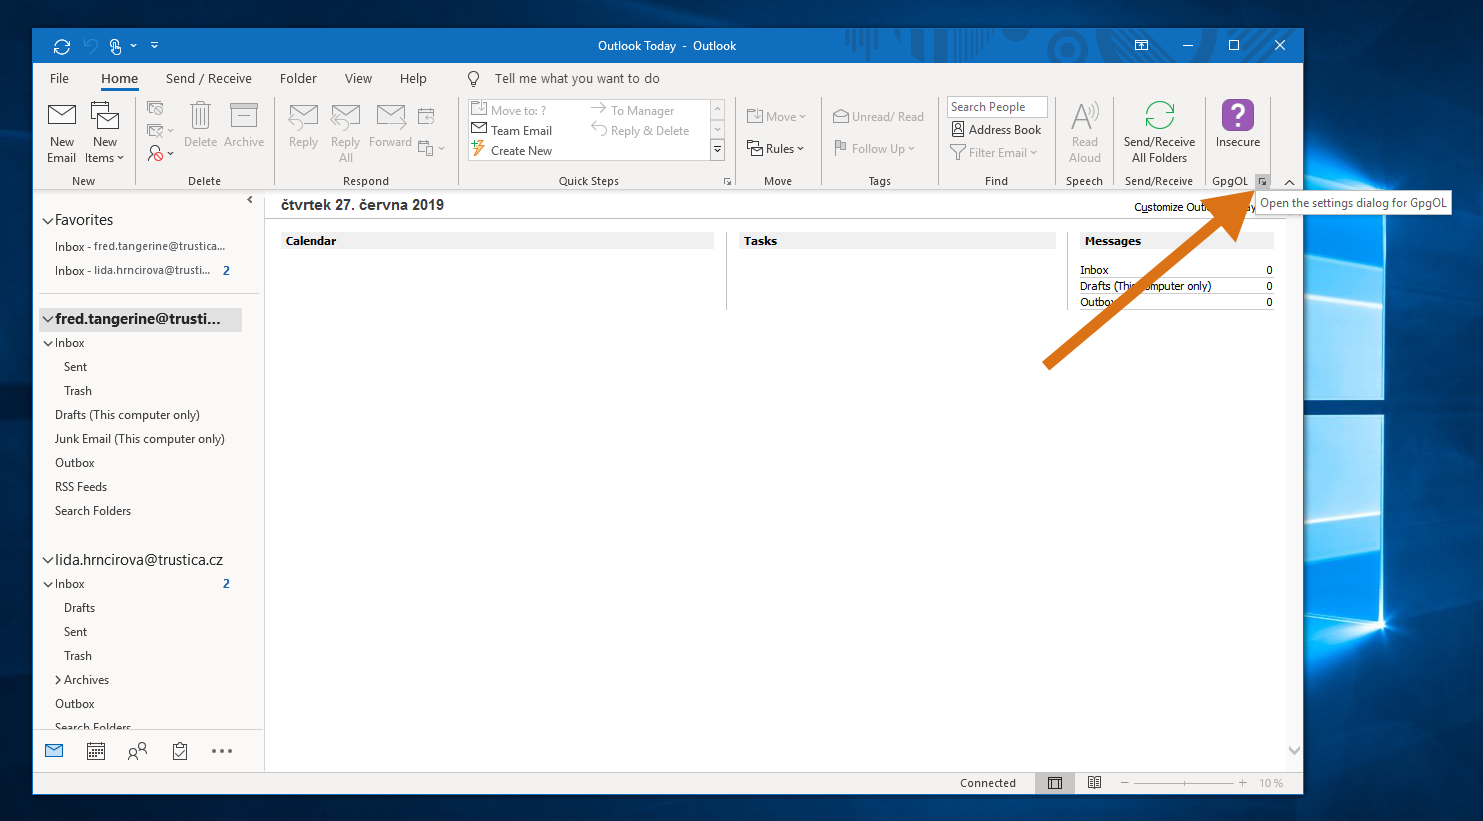
Picture 1: The location of GpgOL pop-up window symbol
- In the General settings, make sure fields „Sign new messages by default“ and „Encrypt new messages by default“ are checked
- In Automation settings, uncheck everything
- Click OK

Picture 2: Recommended settings: green arrows = checked, red arrow = unchecked
By checking „signing and encrypting new messages by default“ in the General settings you won’t need to do it manually before sending the email – this way, you’ll never send a message without signature and encryption by mistake.
If you don’t your emails to be signed and encrypted automatically, you can leave those options unchecked, we will show you how to do these actions manually in following paragraphs.
By unchecking everything in the Automation settings, you’re making sure you’re sending the emails with correct keys of the recipient as well as your own – you’ll check it manually yourself. Otherwise, Outlook will choose the keys on its own which may be a problem if you have old, revoked keys in your key manager.
Signing, Encrypting, Decrypting
If you don’t choose to have your e-mails signed and/or encrypted automatically, you can, of course, do it manually each time while you’re composing the message.
There’s a button with the symbol of Lock on it at the top right corner of the window with the symbol of Lock on it. If you click it, it will both sign and encrypt the e-mail.
If you want to do only one of these actions, click the button saying Secure underneath the Lock symbol, it will show you options Sign and Encrypt. Choose whichever you want to.
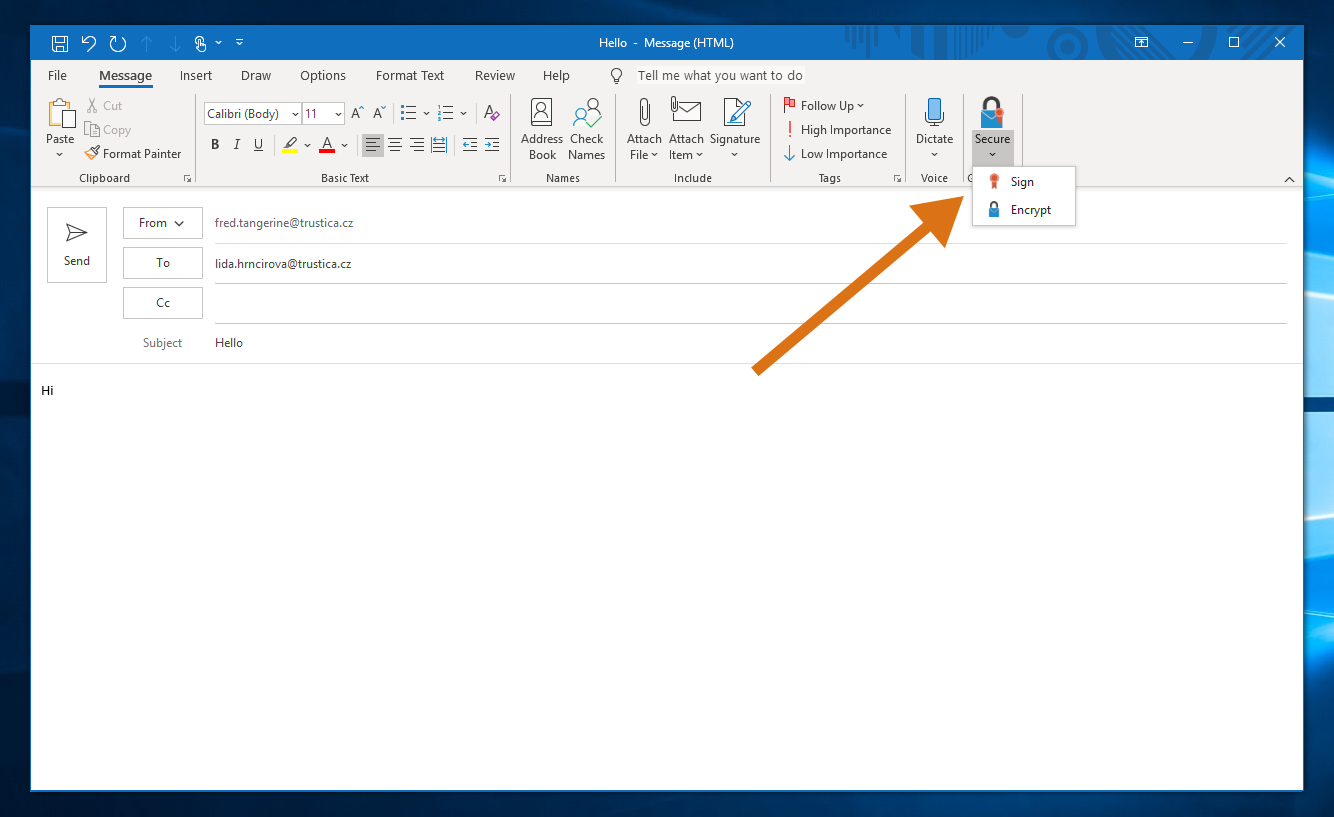
Picture 3: Buttons to manually encrypt and sign your e-mails
Sign
You’re going to need Cryptoucan for this operation since you’re signing the message with your private key.
- Click Sign option in the Secure menu, then proceed with Send
- Security approval window will pop-up, make sure you’re signing the e-mail with correct identity
- Click OK
- Outlook will ask you to enter user PIN1 on Cryptoucan’s keypad
- After confirming the PIN by clicking the hexagon symbol at the bottom right corner of the keypad, the e-mails is sent
To check signatures on messages:
- Open signed e-mail
- Check the field right under the info of sender and recipient or GpgOL icon at the top right corner of the window
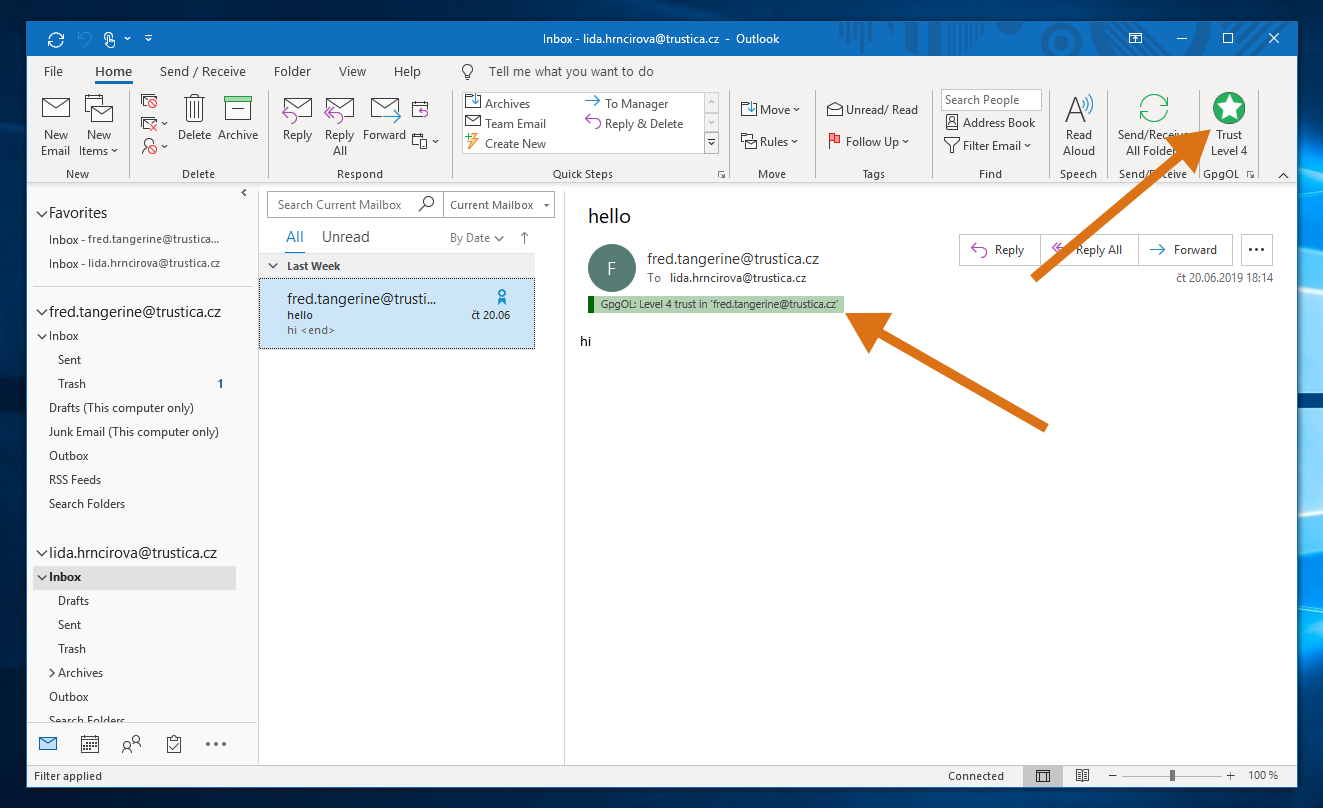
Picture 4: Signature indicator
Encrypt
You don’t need Cryptoucan for this operation since you’re using public key of the person you’re send the message to.
- Click Encrypt option in the Secure menu, then proceed with Send
- Security approval window will pop-up, make sure you’re signing the e-mail with correct identities – the recipient’s as well as your own
- Click Ok and the e-mail is sent
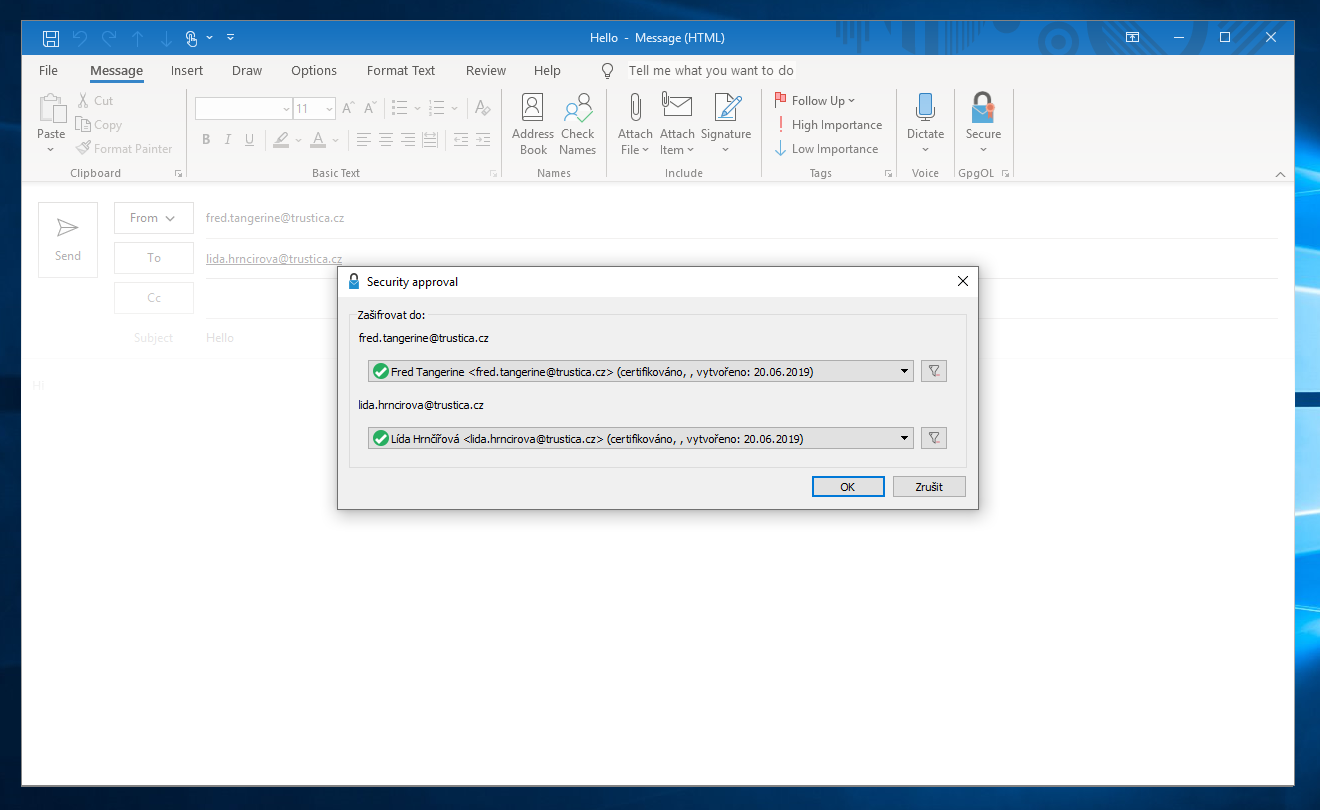
Picture 5: Security approval window where you can check the identities of keys
Decrypt
You need your Cryptoucan once again since you are decrypting the e-mail with your private key.
- Click the encrypted e-mail you’ve received
- Outlook will automatically ask you to enter user PIN1 on your Cryptoucan
- If you successfully enter it and confirm it by pressing hexagon symbol at the bottom right corner of the window, the content of the e-mail is revealed
In case you’re still struggling, watch our video that will show you every step of this this process:
Video 1: Cryptoucan™ usage: Handling e-mails in Outlook
Thank you very much for reading and see you next week!