Cryptoucan™ usage: Enigmail setup on Windows
In this week’s blog post we will look at all the settings of Enigmail on Windows. If your Thunderbird looks different than ours or you’re missing some options, you’ll find your answers here. And, as always, you can also watch our instructional video that’s at the bottom of the post.
You may have the feeling like you’ve seen this post recently – and you’d be right! But this week’s instructional blog post on the topic of Enigmail set up is aimed at our Windows users. If you’re one of them, keep reading!
As you’re watching/reading our how-to-guides, you may get stuck because you just simply cannot find the correct option, settings, button, tab… Unfortunately, Enigmail will set up itself automatically without asking you first – sometimes you’re lucky and it’s set up correctly, sometimes it’s like you’re using a totally different software.
The chapters bellow will help you with the most common differences that occur:
- Enigmail/p≡p menu instead of Enigmail menu
- Inactive Sign and Encrypt functions in the email composition window
- Automatic Encrypting/Un-encrypting and Signing/Un-signing emails
- Choosing incorrect keys for encryption
If you want to see our video on this topic, click here.
The correct Enigmail menu
You’re accessing the Enigmail sub-menu in nearly all of our how to guides. Your menu might look different than ours though, it may show Enigmail/p≡p sub-menu instead of simply Enigmail. Enigmail/p≡p does not offer the options we need so here’s how to change it:
- Click the menu button represented by three lines at the top right corner of the window
- Open the Enigmail/p≡p sub-menu
- Choose Preferences out of the options
New window will open
- Go to the Compatibility tab
- Choose the option Force using S/MIME and Enigmail under the Enigmail Junior Mode heading
And that’s it, you can close the window.

Picture 1: Force using S/MIME and Enigmail
Unlocking Sign and Encrypt email functions
You may also run into the problem of the Sign and Encryption buttons being disabled when you try to send an email. Here’s how to unlock them:
- Hover over your email address that’s in the menu on the left side of Thunderbird
- Open its Context menu (by pressing and holding the Control button and clicking the touch pad or the left mouse button at the same time)
- Choose OpenPGP Security option in the menu on the left side of the newly opened window
Here you need to have these settings checked or selected:
- Option OpenPGP support (Enigmail) for this identity that’s at the very top of the page
- Option Use PGP/MIME by default under the Message Composition Default Options heading
- Option Prefer Enigmail (OpenPGP) at the very bottom of the window
Save the settings by pressing the OK button.

Picture 2: Enable OpenPGP support (Enigmail) for this identity
Automatic Signing and Encrypting
Enigmail may automatically encrypt/un-encrypt or sing/un-sign messages that you are about to send. This may get frustrating if it keeps checking and unchecking the options that you want or don’t want to use. This is accessed the same way as the previous step:
- Hover over your email address that’s in the menu on the left side of Thunderbird
- Open its Context menu (by pressing and holding the Control button and clicking the touch pad or the left mouse button at the same time)
- Choose OpenPGP Security option in the menu on the left side of the newly opened window
In this window you can decide whether you want to encrypt or sign every message by default as well as id you want to encrypt draft messages or sign encrypted or non-encrypted messages automatically.
Even if set here everything accordingly to your needs, Enigmail may still misbehave. Here’s what to do next:
- Scroll at the very bottom of the OpenPGP Security window
- Click the Enigmail Preferences… button
Here you can additionally change the Enigmial preferences for sending. Save the settings by clicking the OK button when you’re done.
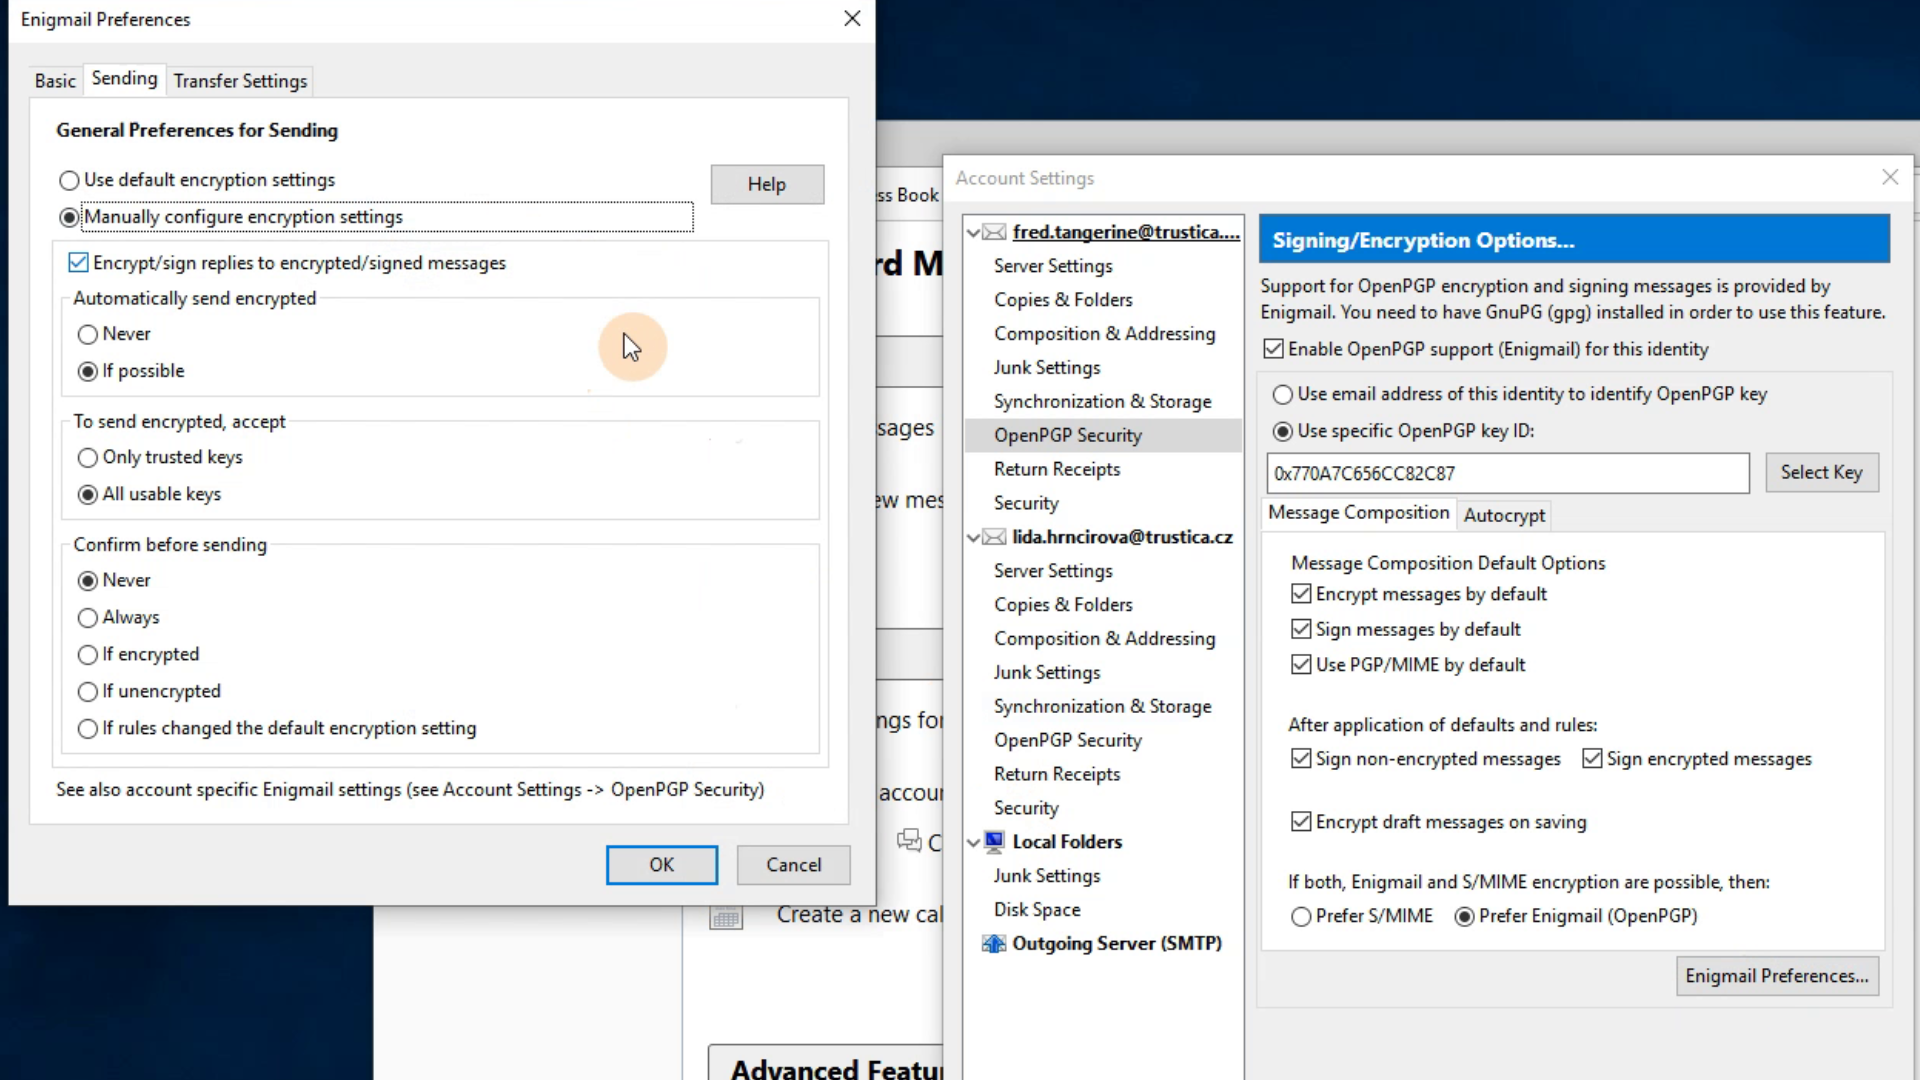
Picture 3: Personalization settings for automatic encryption
Encryption key selection
For security reasons, it is very beneficial to always check whether you’re sending encrypted emails with the key of the correct person. Unfortunately, Enigmail – because of its default settings – won’t prompt you to check the key before sending an email. Here’s how to get it work:
- Open the Thunderbird menu represented by three lines in the upper right corner of the window
- Open the Enigmail sub-menu
- Choose the Preferences option
- Click Display Expert Settings and Menus in the newly opened window
As you may notice, new tabs appeared at the top of the window
- Go to the Key Selection tab
- Check all the options here
- Save the settings by clicking the OK button
The option “Always (also) Manually” is the most important, it will give you the chance to always double-check whether you’re using the correct key when encrypting emails.

Picture 4: Key selection window
One additional benefit
Thanks to clicking the “Display Expert Settings and Menus” in the previous step, new options appeared in the Enigmail sub-menu.
Most notably the option “Manage SmartCard…”. You can see that whenever we are changing PIN codes, generating keys or changing user info on Cryptoucan™, we’re accessing the operations through the process of opening: Enigmail -> Key Management -> File -> Manage SmartCard.
Now we can access the Manage SmartCard window right away!
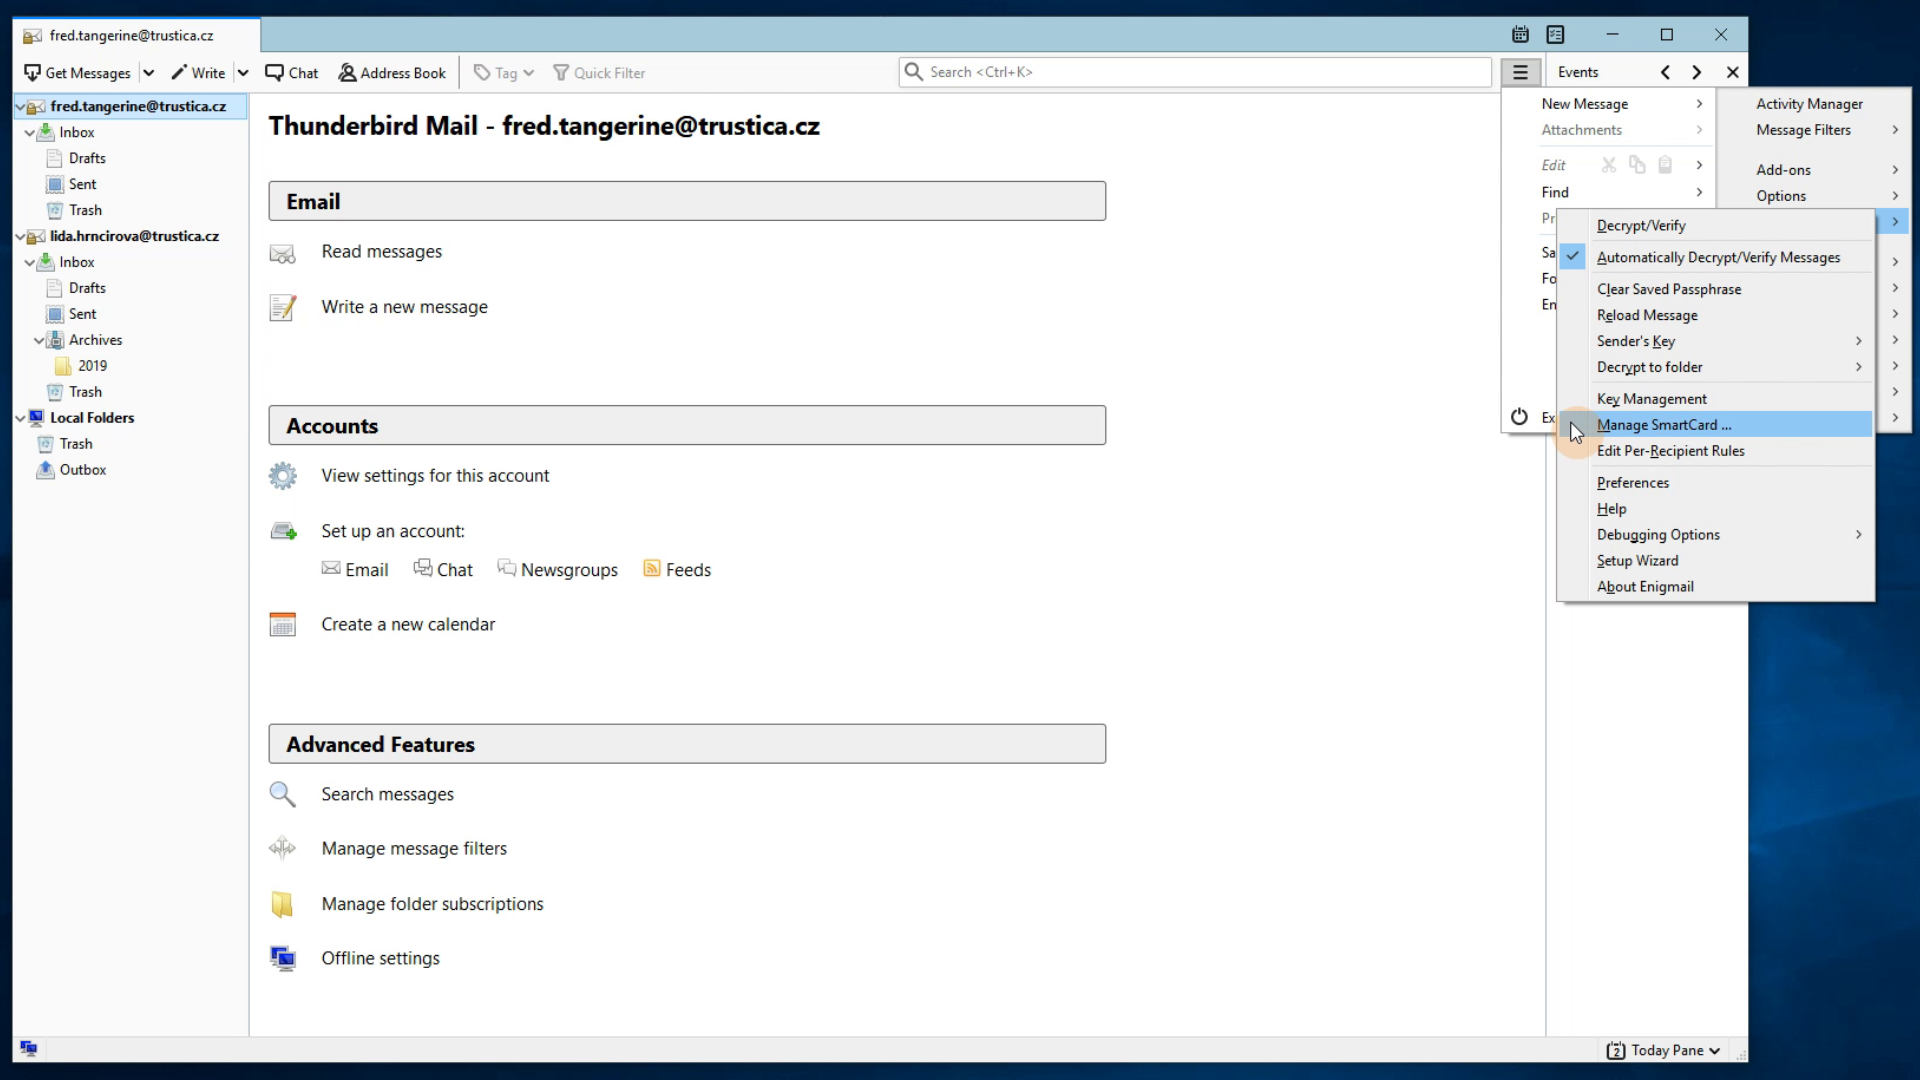
Picture 5: Additional Manage SmartCard option in the Enigmail sub-menu
Here you can watch the whole process done step-by-step:
Video 1: Cryptoucan™ usage: Enigmail setup
And that’s all for today’s post. We will see you next week! Thank you for reading.