Cryptoucan™ usage: PIN management
Written by Dominik Joe Pantůček on 2018-08-02
cryptoucanWhile using an external cryptographic token brings your overall security to the next level - as the keys cannot be stolen from possibly compromised personal computer, it takes more than that to ensure it is not just a false sense of security you get. It is - at least - necessary to protect the keys against an adversary that gains physical access to your Cryptoucan™. And that is where strong PIN protection can be very useful.
Last time, we have shown you how to initialize your Cryptoucan™ by generating your private-public key pairs[1]. Today, we will discuss how to manage PINs[2] that are used to protect the private keys stored in the device memory. Technical description of how the keys are actually protected is beyond the scope of this article, but rest assured, we will write about it in detail in the near future.
As there are some of you that are here just to see the video, you can jump directly to it.
There are actually two PINs you are about to used with Cryptoucan™:
-
the user PIN1, used for common operations like signing, and
-
the administrative PIN3, used for recovering PIN1 or performing other privileged operations.
The user PIN must always be at least six digits long and the administrative PIN must have at least eight digits.
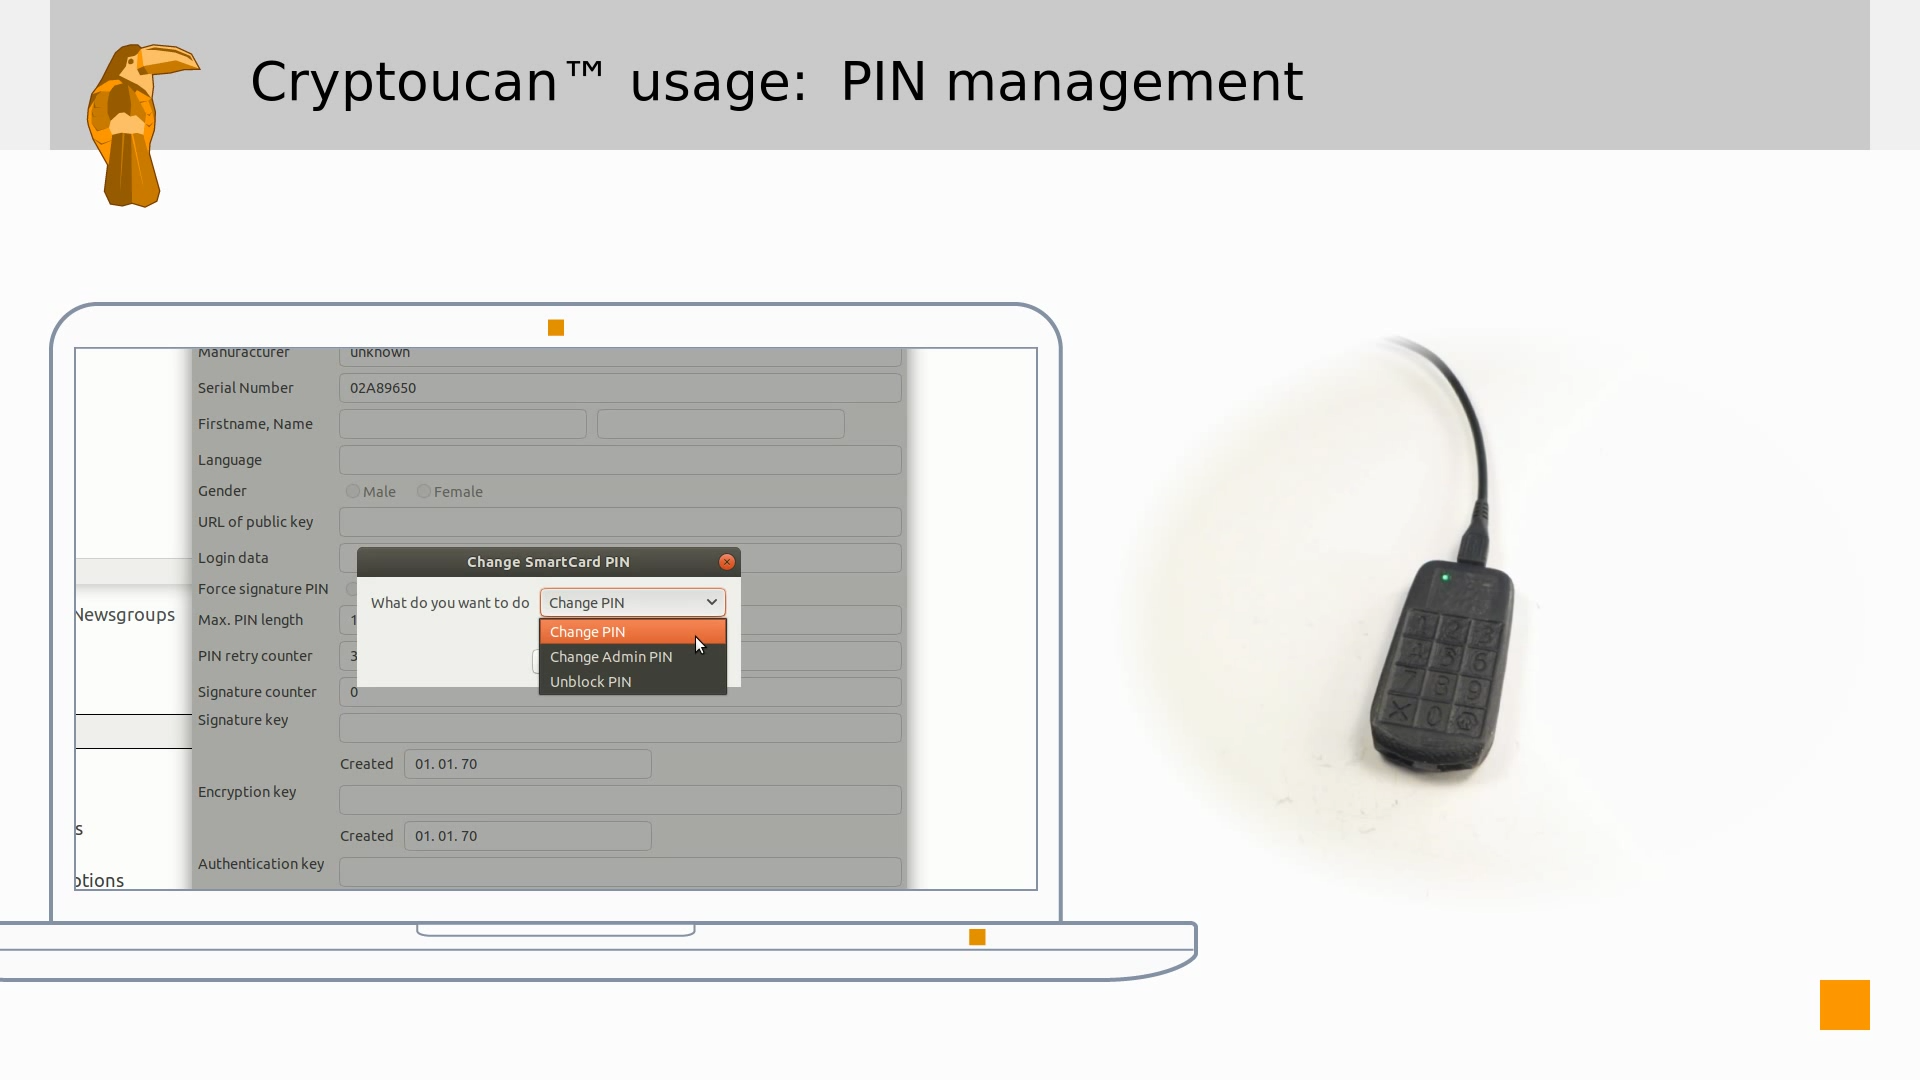
Once again we turn to Mozilla Thunderbird[3] with the Enigmail extension[4] that gives us nice and easy-to-use interface to Cryptoucan™ functions. And as when we were initializing Cryptoucan™, we navigate to the OpenPGP SmartCard Details window and choose the Change PIN option from the SmartCard menu. This brings us to the Change PIN dialog seen in Picture 1.

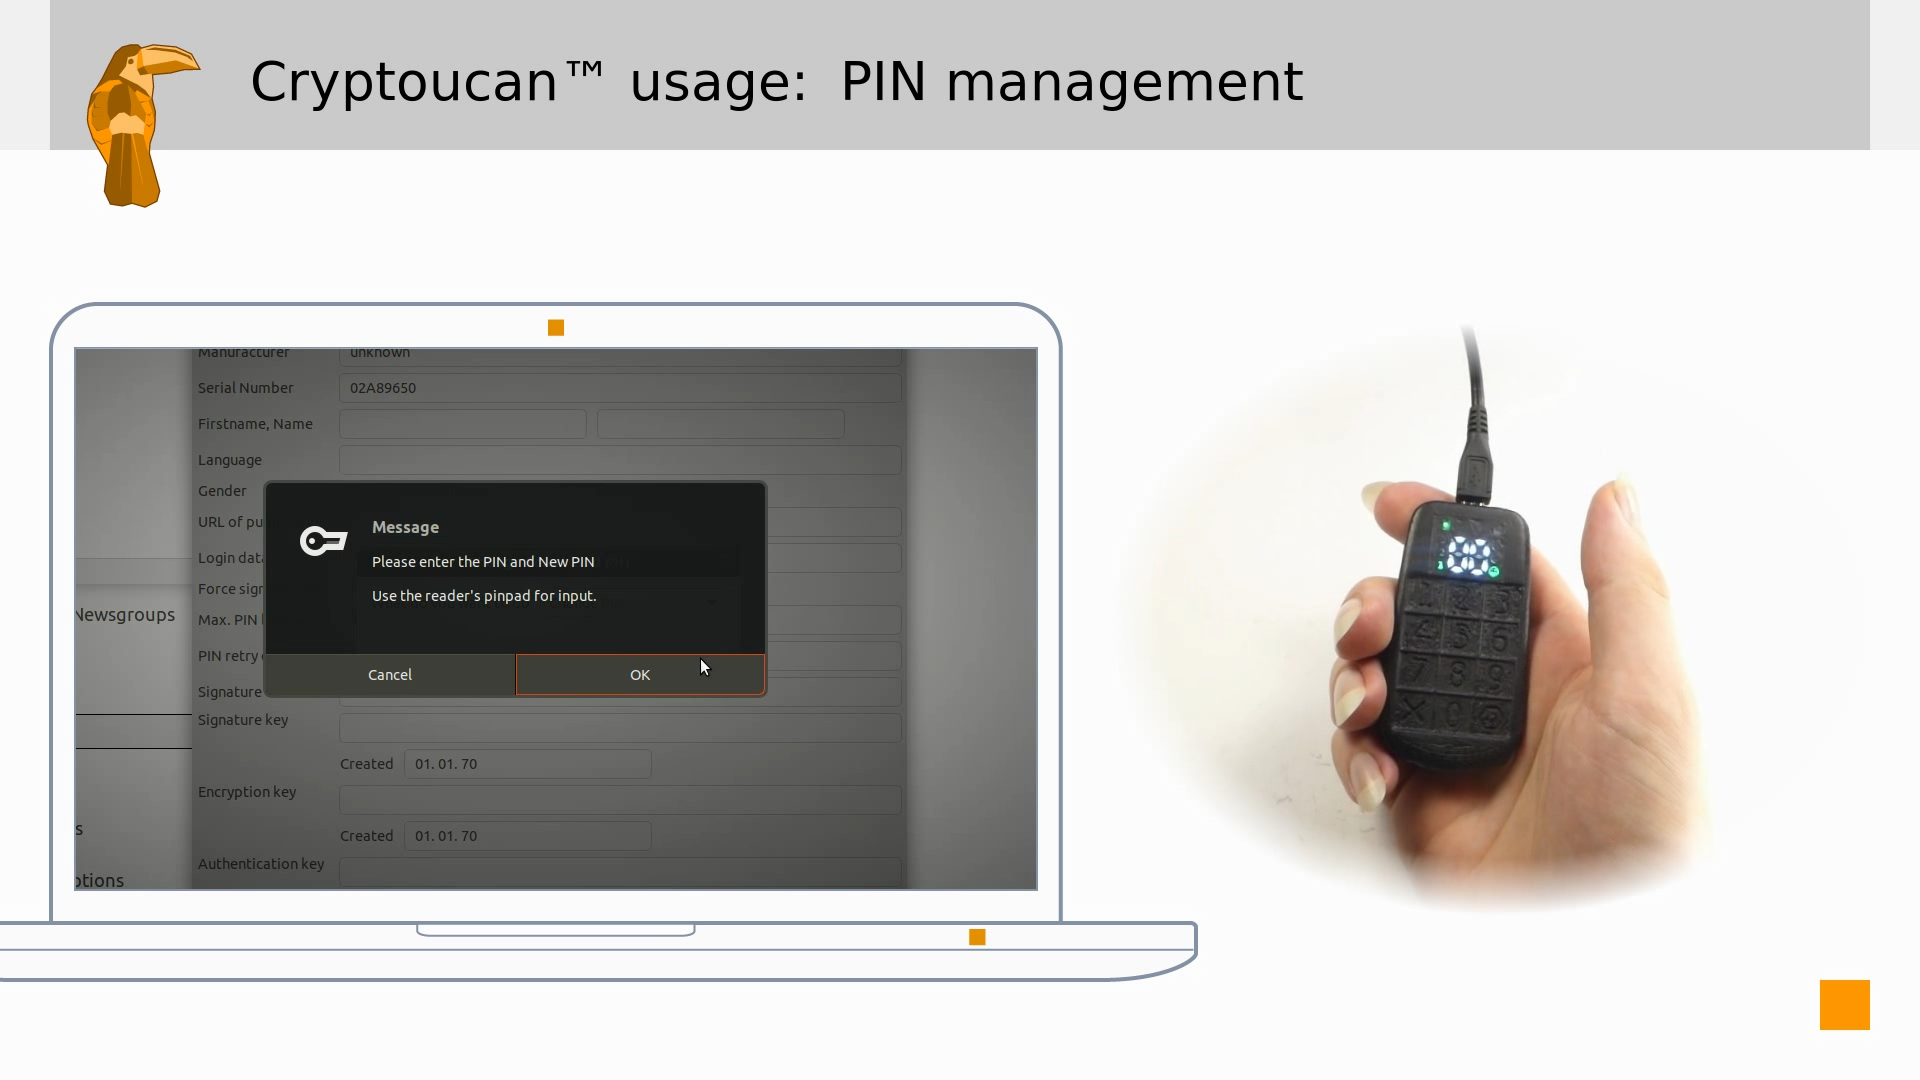
Picture 1: Change PIN dialog. Selecting Change PIN option and clicking the OK button gives control to Cryptoucan as seen in Picture 2 and all we need to do is to enter the original PIN1 and then enter the new PIN1 twice. As you can see, we are changing the PIN1 and therefore the green number one is lit on the left hand side.

Picture 1: Control is given to Cryptoucan™ while changing PIN1. Changing the administrative PIN3 is similar. We just select the Change Admin PIN option in the Change PIN dialog and proceed. And again, it is necessary to enter the original PIN3 and then enter the new PIN3 twice to confirm. And of course - the red number three is lit on the left hand side.
In spite of giving you another important and solid layer of security, managing your PINs is really that easy. You can see the process of changing PIN1 and PIN3 in Video 1 below.
Video 1: Changing Cryptoucan™ PIN1 and PIN3.
Thank you for staying with us developing Cryptoucan™ for so long and as usual, you can expect more next week. See ya then!
References
-
https://trustica.cz/en/2018/07/26/cryptoucan-usage-initialization/
-
Wikipedia contributors. (2018, July 22). Personal identification number. In Wikipedia, The Free Encyclopedia. Retrieved 17:13, July 25, 2018, from https://en.wikipedia.org/w/index.php?title=Personal_identification_number&oldid=851423929
-
Mozilla Thunderbird, available online at https://www.thunderbird.net/
-
Enigmail: A simple interface for OpenPGP email security, available online at https://enigmail.net/
