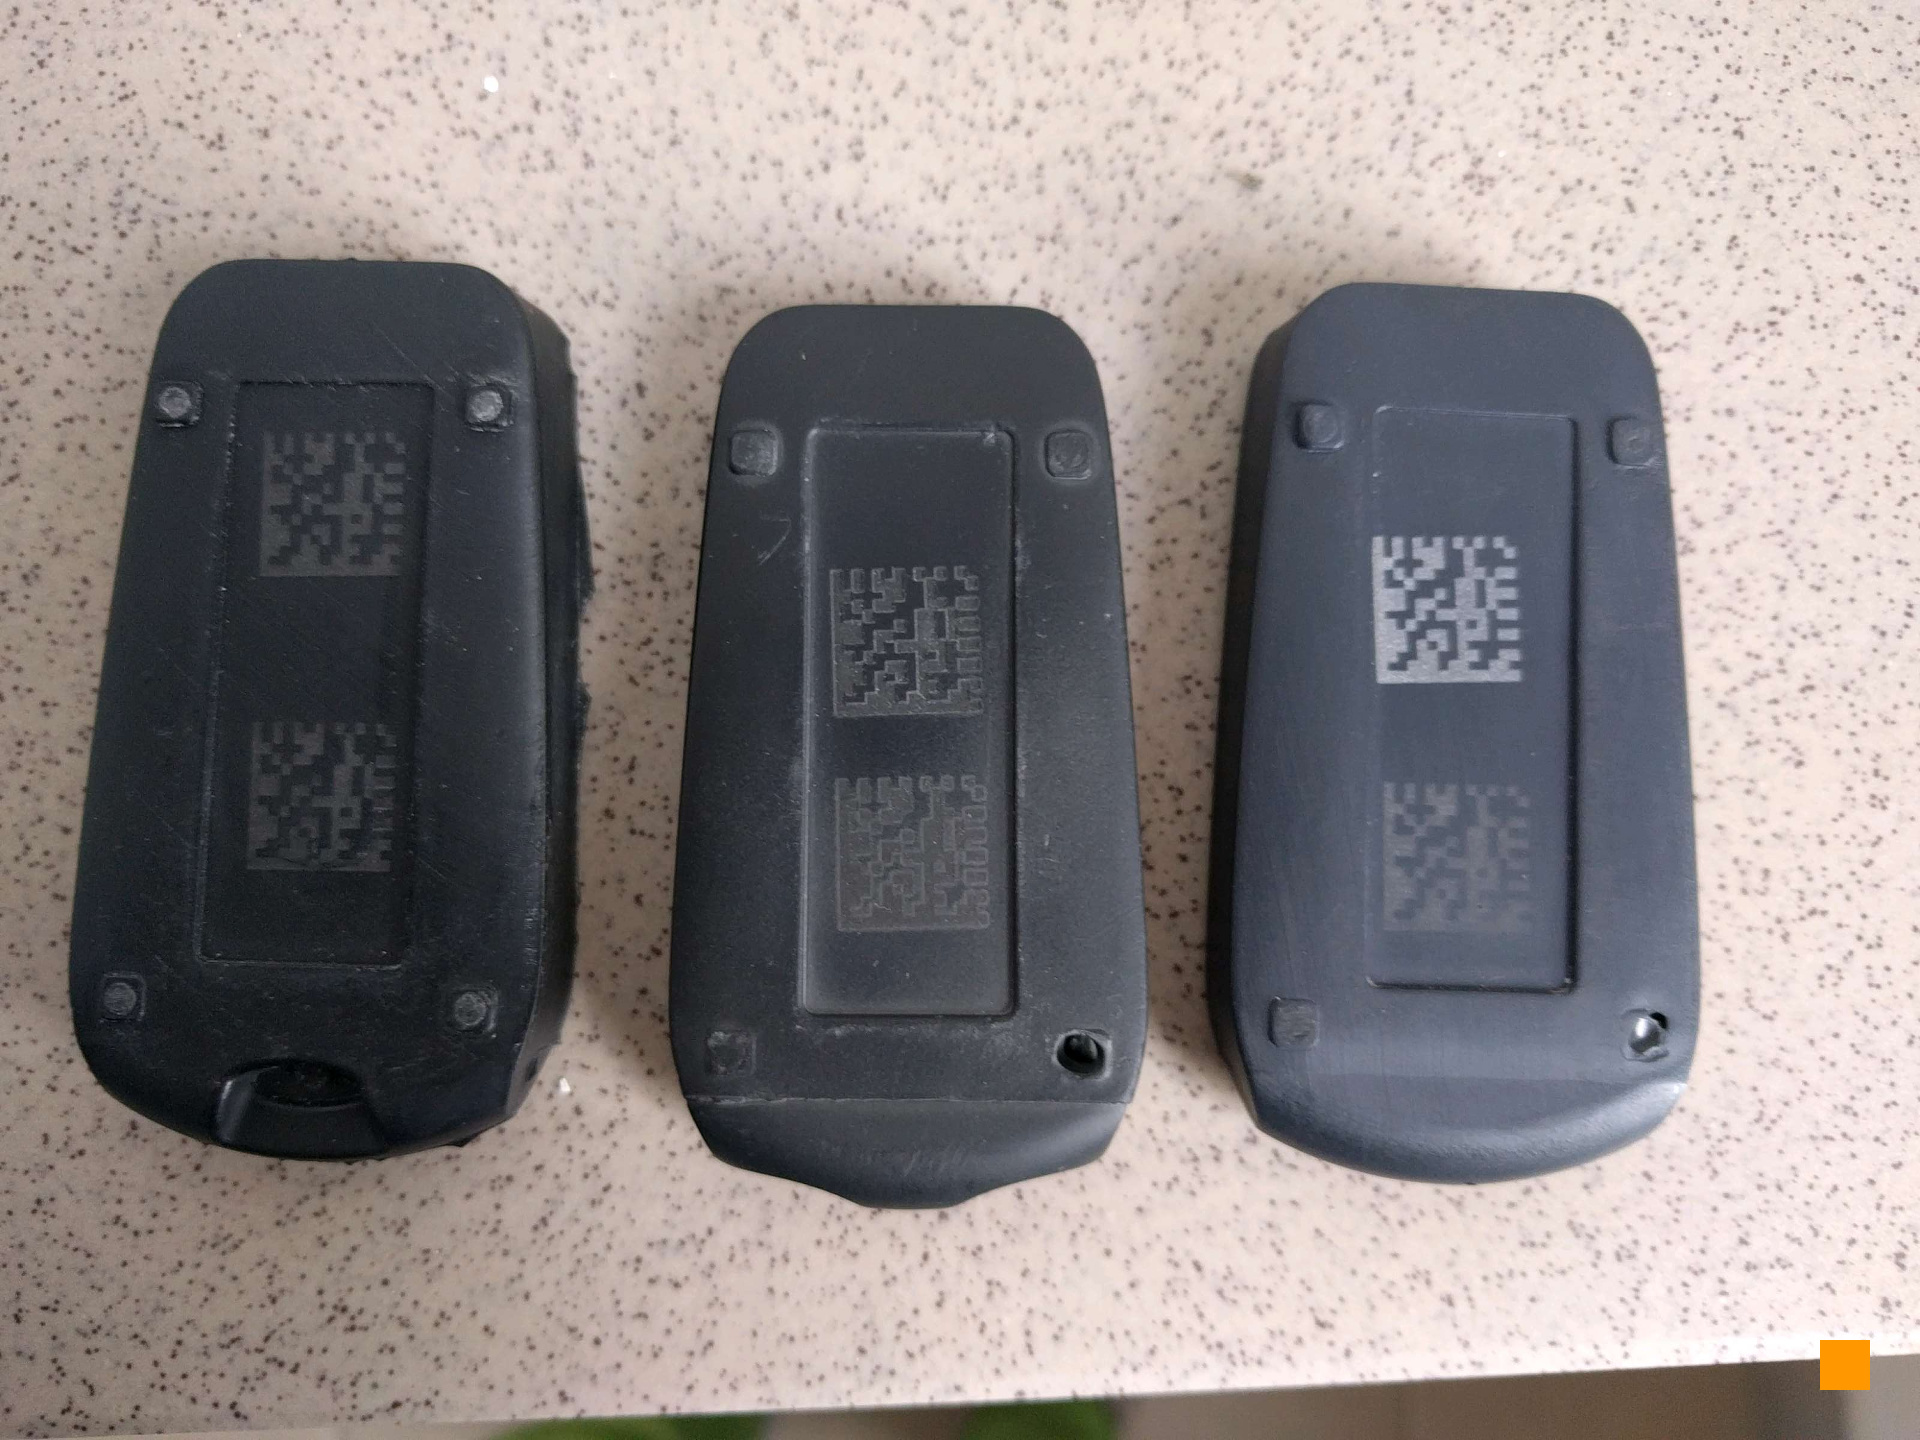
Cryptoucan™ laser engraving
Written by Dominik Joe Pantůček on 2018-09-28
cryptoucanAlthough the time is running really fast as we are preparing for regular batch production, there still were some interesting challenges. One of them was the engraving. Read on to find out why.
Each and every Cryptoucan™ is identified by its main MCU's serial number. Cryptoucan™ derives its serial number from this one and as you can imagine, when the devices are produced, they all look the same. It is crucial to provide them with some physical identification.
That is, where engraving comes handy. We decided to engrave the product identification and serial number on the back side of the device, include QR code for easy scanning both by our logistics department, customers and end-users and we even managed to squeeze there two lines of custom text - that is, if the customer requests it.
The good thing about the epoxy we have chosen is that you can easily draw something on its surface using laser engraving techniques. This allows us to programatically generate images for the laser engraver on the fly and ensure every device gets the right image engraved.

Picture 1: testing various power settings of laser engraving on various materials. As you can see in Picture 1, there is still some way to go - but the results look definitely promising.
We tested the Electrolube epoxy as well and it turns out it yields the best results. That is a pity as this epoxy looks terrible. With the Loctite epoxy[1], although the contrast is slightly lower, it looks really good. As expected - different materials, different results.
Thank you for following us and see you next week!
References
