Cryptoucan™ usage: Key management on macOS
Written by Lída Hrnčířová on 2019-09-12
cryptoucanIn today's blog post we will show you how to import public keys to your library, how and why to sing them, how to export your own public key and how to display details about the keys. As usual, this is accompanied by instructional video showing you all the process.
You've already personalized your Cryptoucan™ and got your own set of keys and PIN codes. Now it's time to finally show you what to do before you'll be able to send your first encrypted email and how to get your public key ready for others to use.
If you came just to see the instructional video, click here!
Export
You will most probably be exporting keys when you want to share your public keys with others so they can send you encrypted emails. This will export your public key, which you can then put to your personal webpage, upload to a key server, or just send to people. This is how you do it:
-
Select the key you want to export
-
Proceed with the Export option at the top of the window
New window will open. Here you can:
-
Select the folder in which you want the key to get exported to
-
Change the name of the file
You may also notice the option "Include secret key in exported file", this option won't work though as you cannot export your secret key as a security feature of Cryptoucan™.
-
Set up the name file and the folder
-
Click the* Save* button when you're finished
And that's it! Your public key is now ready to use

Picture 1: Exporting a key
Import
You're going to need to import public keys of others to be able to send encrypted emails to them. Key manager is basically a library that stores all the keys you need.
You'll get the public key file from the person himself/herself, from key server or from trusted key server. This is how you import keys into it:
-
Click Import option at the top of the window
-
Find the key file in your folders and files
-
Choose the key file
-
Click Open
Dialog window saying "Import successful" will appear when the process is done.

Picture 2: Importing a key
Signing keys
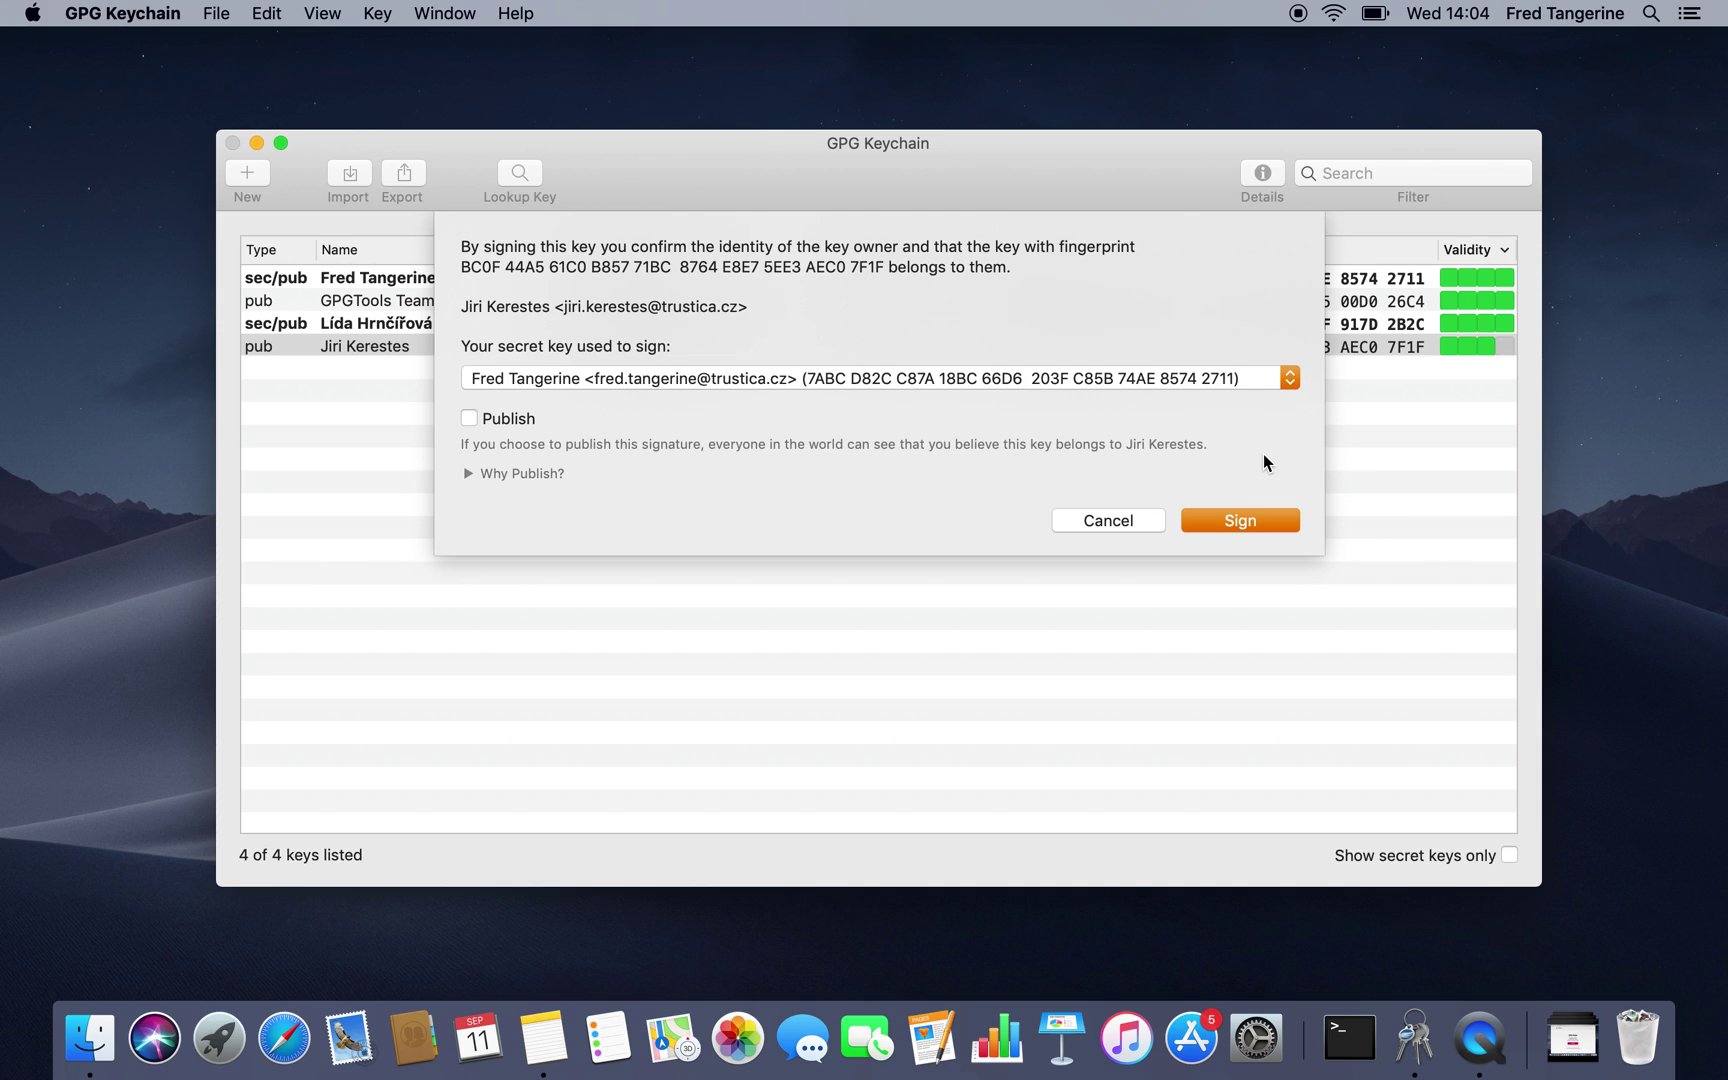
By certifying the keys you've imported, you're making sure the key really belongs to the person it's supposed to. This is done by comparing fingerprints. Fingerprint is a kind of checksum which is statistically unique to each key.
To check the fingerprint of the key you've imported, you'll have to retrieve the key fingerprint from the key owner via a trusted channel. Some examples are:
-
Messaging or calling the person.
-
Getting it from their trusted website
When you get the fingerprint from your trusted source, this is what to do next:
-
Select the key you imported
-
Open its Context menu (by clicking and holding the Control button and clicking the touch pad/left mouse button at the same time)
-
Select option Sign... in the context menu
You will see this key's fingerprint in the text at the top of the window
-
Compare the fingerprints
-
Proceed with the option Sign if they match
GPGTools will ask you to enter user PIN1 on your Cryptoucan™ to sign the key with your identity.
-
Enter the PIN
-
Confirm it by pressing the hexagon symbol at the bottom right corner of the window
-
Click OK when the process is done
And that's it, the key is now signed and its trust level is now higher.

Picture 3: Fingerprint check
Display details
The last thing you need to know for basic operations in the key manager is displaying details about the key identity of keys in your library. Here is how you can display them:
    <li lang="en-US">*Select the key* you're interested in
    <li lang="en-US">Choose option *Details* in the upper right corner of the window
And that's it!

Picture 4: Window with details about the identity Here you can watch the whole process done step-by-step:
Video 1: Cryptoucan™ usage: Key management on macOS And that's all for today's post. We will see you next week! Thank you for reading.
